Getting started: your first 5 minutes
AI Workforce OS is a 3D virtual office where the employees are AI agents. In about five minutes you will create your account, ask for your first task, decide an approval and read the report the team leaves behind.
On this page
- Create your account
- Ask for your first task
- Watch the team collaborate
- Decide your first approval
- Read the report and check your coins
- Complete the Getting started list
Create your account#
Every new account creates its own organization, separate from everyone else's, and you become its Owner. The office starts with 1,000 welcome coins for the Shop.
- Open app.workforceai.es and press “Create a new account”.
- Enter “Your name”, “Your company name”, “E-mail” and a “Password” of at least 10 characters.
- Press “Create account”.
- If you receive a confirmation e-mail, open its link within 24 hours to enter your office.
Tip
If you want to look around before signing up, press “Or try it without signing up” (when available) to get a trial username and password valid for 24 hours.
Warning
A trial account's work is lost when it expires; create an account if you want to keep it.
Ask for your first task#
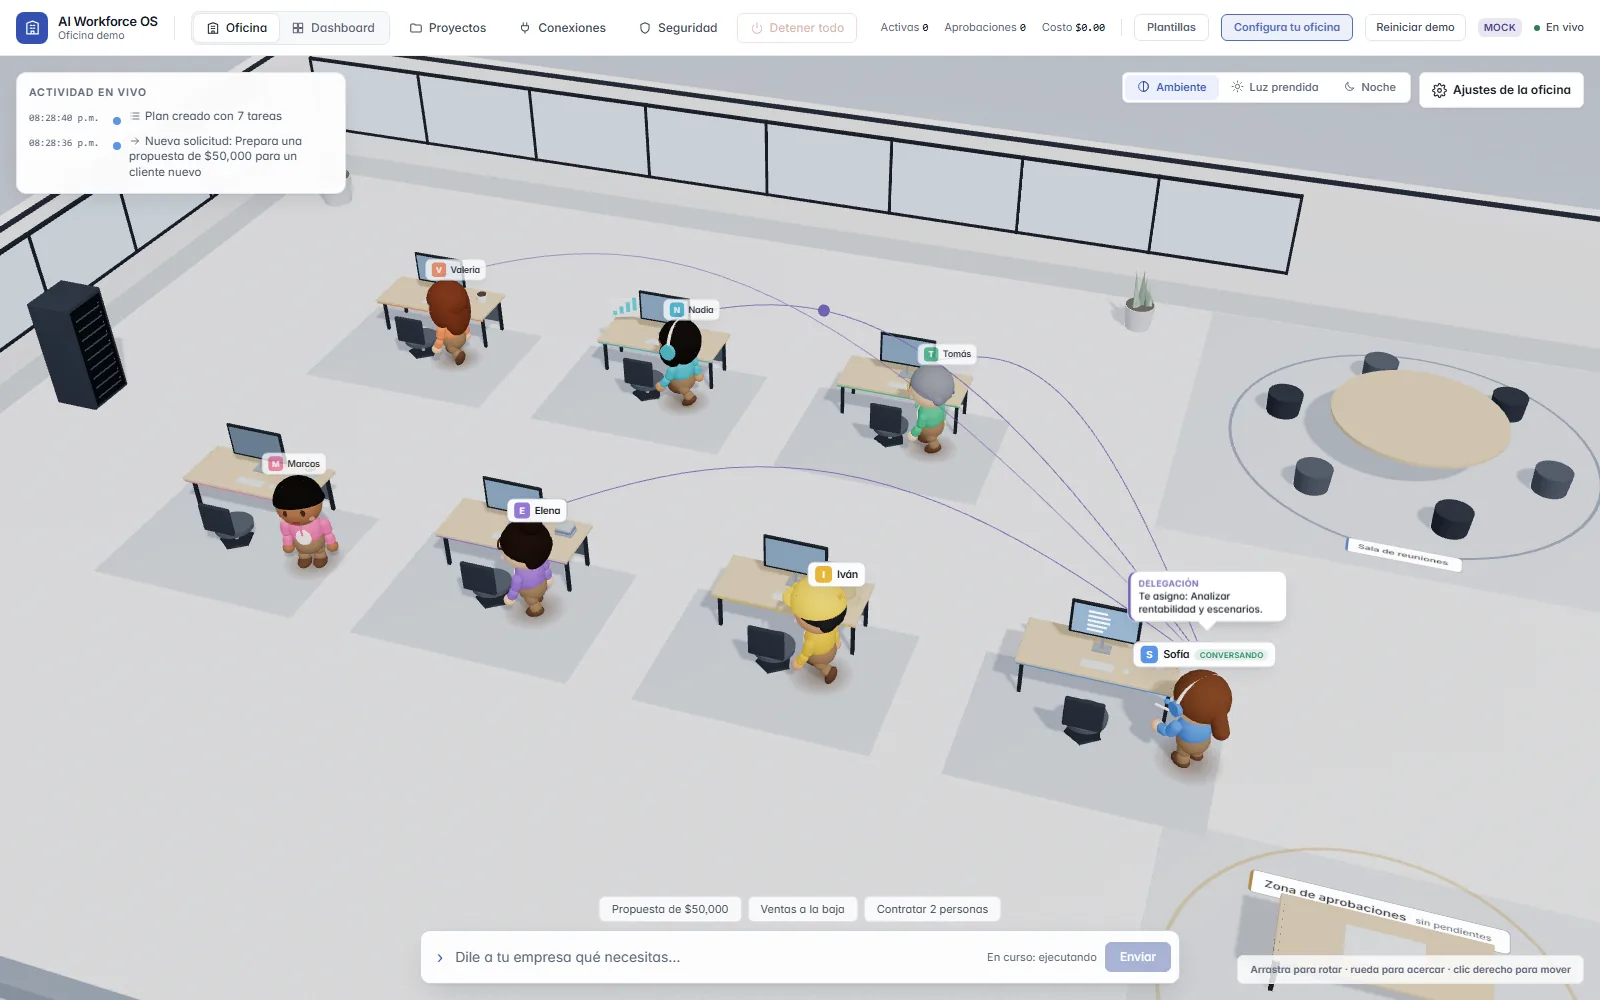
When you sign in you land on the Office: a 3D scene with your team and, at the bottom, a bar to talk to the whole office the way you would talk to a team lead.
- Press one of the shortcuts above the bar: “Say hi”, “Finance”, “$50,000 proposal”, “Sales are down” or “Hire 2 people”.
- Or type your request in the bar “Write to the office: say hi, ask or request something…” and press “Send”.
- Read the answer in the office chat, right above the bar. If it is a task, you will see who it was assigned to and why.
Note
If the server has no model provider configured, the AI runs in simulation mode: answers are scripted, there is no model cost, and the flow is the same as with a real model.
Tip
Start with “$50,000 proposal”: it always asks for an approval, so you go through the whole flow.
Watch the team collaborate#
Each person in the scene is an agent and moves according to what they are doing: working at their desk, meeting others to plan, or waiting in the approvals area.
- Check the “Live activity” box at the top left to follow every step the agents take.
- Look at the status in the office chat header: “In progress: planning”, “running” or “waiting for your approval”.
- Click an employee to open their panel, see their work and write to them directly.
Tip
Drag to rotate the view, use the scroll wheel to zoom and hold the right button to pan.
Decide your first approval#
When an agent wants to do something sensitive, it stops and waits for your decision. Nothing continues until you decide.
- Open the pending approvals tray at the bottom left of the office.
- Read what the agent wants to do and its risk level.
- Press “Approve” to let it continue or “Reject” to stop it.
Note
Deciding approvals requires the Admin or Owner role. If your role cannot, the card tells you so and shows no buttons.
Tip
Rejecting is a valid answer too: that is what the human step is for.
Read the report and check your coins#
When a request completes, a report is generated, and every finished task adds coins to your organization. Coins are not money and cannot be bought: they are only earned by finished work and spent in the Shop.
- Press “Dashboard” in the Office / Dashboard switch of the top bar.
- Open “Reports” and pick the report for your request.
- Look at the “Coins” counter in the top bar and press it to open the Shop.
Complete the Getting started list#
While you have steps left, the top bar shows the “Getting started” button. It holds four tasks that prepare your office for real work, and each one ticks itself when you complete it:
- “Tell your office about your business”: business type, tone and language, from Settings.
- “Connect a tool”: e-mail, calendar, files or others.
- “Choose how much freedom your team has”: from “suggest” to “autonomous”.
- “Ask for your first task”.
Tip
The “?” button in the top bar opens a guided tour of the screen you are on.
Try it in your own office
Create your account and land in an office with your AI team. For now the AI runs in simulation mode: scripted responses, no cost and nothing to connect.